
In Kenya, where landscapes range from bustling urban centers to remote villages, having reliable internet is more than just a luxury—it’s a necessity. Whether you’re working remotely, running a business, or staying in touch with loved ones, a strong internet connection can make all the difference. That’s where Starlink comes in, offering high-speed satellite internet that reaches even the most remote parts of the country. If you’re considering bringing Starlink into your home or business, here’s a human-friendly guide to installation that will have you connected in no time.
Why Choose Starlink for Your Internet Needs?
Before we dive into the installation process, it’s important to understand why Starlink is such a game-changer for Kenya. Traditional internet services often fall short, especially in rural or underserved areas where laying fiber-optic cables is costly and time-consuming. Starlink, with its network of low Earth orbit satellites, bypasses these limitations, bringing fast, reliable internet to virtually any location in Kenya. Whether you’re in Nairobi, Kisumu, or a remote village, Starlink ensures you’re always connected.
How to Install Starlink in Kenya: A Step-by-Step Guide
1. Unboxing and Setup Location:
When you receive your Starlink kit, the first step is to carefully unbox all the components. Inside, you’ll find the Starlink dish (often called the “Dishy”), a mounting tripod, a Wi-Fi router, and the necessary cables. The first critical step is choosing the right location for your Starlink dish. It needs a clear, unobstructed view of the sky to connect with the satellites overhead. This might be your rooftop, backyard, or any elevated spot with minimal obstructions like trees or buildings.
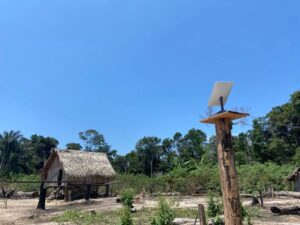
2. Setting Up the Dish:
Once you’ve found the perfect spot, place the dish on the mounting tripod or install it on a permanent mount if you prefer. The dish is designed to automatically adjust and find the best satellite connection, so after positioning it, simply plug it into a power source using the provided cables. The dish will automatically start searching for satellites—this might take a few minutes, so be patient.
3. Connecting the Router and Finalizing the Setup:
With the dish in place and powered on, it’s time to connect the Wi-Fi router. Plug the router into the dish using the provided cable, then power on the router. You’ll need the Starlink app, which you can download to your smartphone. The app will guide you through connecting your devices to the new network and provide real-time updates on signal strength and connection quality. Once the app indicates that you’re online, congratulations—you now have high-speed internet via Starlink!
Why Installation is Just the Beginning
Installing Starlink in Kenya is a straightforward process, but the benefits extend far beyond the initial setup. With Starlink, you’re not just getting internet access—you’re opening the door to endless possibilities. Students in remote areas can access online education resources, businesses can expand their reach through e-commerce, and families can stay connected with loved ones, no matter where they are.
At Starlink Kenya, we’re here to support you every step of the way. From choosing the right Starlink package to guiding you through the installation process and beyond, our goal is to ensure that every Kenyan can enjoy the benefits of reliable, high-speed internet. Visit our website to learn more about how Starlink can transform your connectivity experience and take the first step towards a more connected future.
This blog post provides a clear and human-centered explanation of the Starlink installation process in Kenya, making it accessible and easy to understand for readers. The inclusion of the hyperlink to your website encourages readers to explore further and consider Starlink for their own connectivity needs.